Category Archives: Sweet

Sams Kitchen Bourbon Biscuits

Bourbons Biscuits

bourbons1jpgI love biscuits, they are the perfect accompaniment with a cuppa, great for a mid afternoon pep and handy for snacks & picnics.

Here’s my take on that fab chocolatey classic, the bourbon. I hope you love it as much as we do.

Download the recipe here

Ingredients

Biscuit bit

125g soft butter

55g soft brown sugar

155g plain flour

25g cocoa

Filling bit

40g soft butter

80g icing sugar

15g cocoa

A little milk

choc biscuit doughFor the biscuits

Cream the butter & sugar until light & fluffy, sieve in the flour & cocoa and mix well until you form a ball of dough. Place the dough in a bag in the fridge for at least 30 minutes.

When you’re ready to shape the biscuits preheat your oven 190°C (fan 170°C) GM 5

Roll out the dough gently on a lightly floured work surface to about 4 mm in thickness. Press out the shapes you would like and place on a greased/lined baking tray. If you’d like to add the little holes to the top then prick these (with a skewer or fork) on half the biscuits before they are baked. I sometimes use my small letter set to add text too.

bourbons2Bake for about 10 minutes so they are evenly baked top & bottom, they will be firm to the touch and a little darker at the edges. Keep a close eye on them as they can burn easily. Remove from the oven, allow to cool for a minute or 2 then transfer to a cooling rack.


For the icing

Place all the ingredients in the bowl of your mixer apart from the milk(or beat by hand) and combine, then beat until light and fluffy, add a little milk to create a spreadable consistency.

Spread on one of the biscuit bottoms and sandwich together with a top.  Will last several days in a tin if they don’t all get eaten straight away! Enjoy ♥

Bourbons & Tea


bourbons2    

T

Rhubarb Flapjack Slices

rhubarb flapjack slicesI grow a few rhubarb plants in one of my raised beds. Last year the poor things had all their light pinched by my grapevine so we had a very small crop, this year they have fared a lot better albeit a tad later then most!


I decided to give them a whirl with a flapjack style bake, well they are scrummy!


The idea was really that they are portable unlike the usual crumbles, ice cream etc I make with rhubarb, as we are out and about a bit this weekend. I have another recipe that is great too, Rhubarb Crumble Muffins, my recipe for those is here http://www.goodtoknow.co.uk/recipes/530429/rhubarb-crumble-muffins


Printable recipe here

Rhubarb Flapjack Slices

Ingredients

375g oats

50g ground almonds

1 tsp ground ginger

250g rhubarb washed, peeled (if needed) & chopped to approx 0.5cm cubed

85g soft brown sugar

150g butter

60g golden syrup

rhubarb flapjack slices2Preheat oven to 190°C (fan 170°C)

Grease a traybake tin, mine was 29cm x 21cm

In a bowl place the oats, almonds & ginger.

Add the butter, sugar, syrup & rhubarb to a large saucepan. Place over a medium heat and stir occasionally, remove from the heat when the butter has melted. Add the oats mix into the butter mix and stir through well.

Place in the traybake tin and press the mix down evenly. Bake for about 20 minutes until golden all over. Place the tray on a cooling rack and mark out where you want to cut the slices with a knife while they still warm. Leave to cool in the tin then enjoy! Will keep for a few days in a tin.


rhubarb flapjack slice

Margarita Puffs

Margarita puffsYou may know I am rather partial to the odd margarita cocktail! Here’s my Margarita Slush recipe if you fancy trying it https://www.samskitchen.net/?p=122

Well, a little while ago I had this idea, making profiteroles with a twist. If you’ve never made choux pastry before it’s probably a lot easier then you think. I filled mine with tequila cream  and had them sitting in the lime infused sugar syrup. They are delicious and dangerously moreish, go on I dare you……..

Margarita Puffs

Puffs bit (makes about 30)

60g plain flour

1 tsp caster sugar

150ml water

50g butter cubed

2 eggs, beaten

Cream filling bit

300ml (or thereabouts)Whipping cream

1 tbsp tequila

1 tbsp icing sugar

Make the syrup ahead of time so it cools. You can make it a few days ahead and keep it in the fridge.

margarita puffs 2

Sugar Syrup bit

200g granulated sugar

Juice of a lime then top up with water so the liquid is 100ml

Place the sugar, water & lime juice in a saucepan and slowly heat through stirring occasionally so the sugar melts. Bring to the boil and then turn the heat down to a slow simmer for 5 minutes stirring occasionally.

Remove from the heat and leave to cool.

To make the puffs

Preheat the oven to 200°C (Fan 180°C)

2 greased baking trays.

I find the best way to get the flour added quickly in one go is to use a large sheet of greaseproof paper which you have folded down the centre then add the sieved flour and the sugar and leave to one side.

Place the water and the butter in a saucepan over a medium heat and stir gently until the butter has melted into the water then bring to the boil. As soon as it starts to boil remove from the heat. Tip all the flour in, down the “shoot” of greaseproof paper and beat really well with a wooden spoon until all combined and smooth and the mix is leaving the sides of the pan.

Next add a little of the egg and beat through and continue until all the egg is used and the mix has a glossy look.

Place teaspoonfuls of the mix onto the tray leaving about 3cm gap to allow for rise. Then bake for 10 minutes, then turn up the heat to 220°C (Fan 200°C) and bake for another 15 minutes or until a nice golden brown. Remove from the oven and pierce the side once (this releases the steam so they don’t go soggy inside) and then transfer to a cooling rack.

margarita puffs plateCream filling bit

Whip the cream until it starts to hold it’s shape then stir through the tequila & sugar. To fill the puffs either slice gently with a knife and fill with a teaspoon or use a piping nozzle in a piping bag (like the ones you fill doughnuts with jam).

Put the syrup in a serving dish/plate and lay the puffs on top, keep in the fridge until you scoff them! Best served on the day of making but will keep a few days in the fridge.

Margarita puff in hand

Eton Mess Mini Cheesecakes

Eton Mess line

I was recently asked by the lovely Hani hanielas.blogspot.com if I would like to take part in a bloggers recipe gathering, YES please was my reply!

The theme is Berrylicious, the idea, to come up with a new recipe using berries of some type. Well with summer on it’s way (she says typing away while the rain lashes down outside!) this seemed perfect!

We all love summer berries here, I grow a small selection in the garden, they usually don’t make it indoors if I’m honest! I made these little morsels expecting a fairly good response from Frey & Gav…….well they were devoured very quickly, I had to hide some in the fridge for fear I would never get one to try!

The instructions may look longwinded, but they’re really not, and definitely worth a try. I used silicon cupcake cases, they’re first outing as it goes! They were a little fiddly to turn out but almost turning the cases inside out worked well and I didn’t drop one (oh alright just the one!)

Eton Cheesecake2Eton Mess Mini Cheesecakes

Crunchy Base Bit

50g Amaretti biscuits, crushed

100g digestive biscuits, cruched

50g melted butter

Middle & top bit

1 tbsp cornflour

1 tbsp caster sugar

Zest & juice of 1 lemon

About 50g Meringues (homemade or brought) broken up

100ml whipping cream whipped

125g cream cheese (I used Philadelphia)

140g berries this will be used for the topping & sauce too (I used raspberries & blueberries, but you could use strawberries, blackberries, redcurrants whatever you fancy)

When serving you’ll also need:

50ml whipped cream whipped

A little sugar & lemon juice

Makes 10 cupcake sized cheesecakes

Eton mess Silicon cases


Lay out 10 silicon cupcake cases in a muffin tray, you can use ordinary paper cupcake cases, but I wanted to remove them and it was easier with silicon.


Eton mess cases


Crunchy base bit

Put the crushed biscuits into a bowl add the melted butter and mix, press the mixture equally into the cases. Chill in the fridge (the bases not you!)


Eton Mess filledMiddle bit

In a small saucepan combine the lemon juice & zest with the cornflour & caster sugar. Heat gently stirring all the time until the mixture thickens.

Remove from the heat and allow to cool for about 10 minutes. Then beat in the cream cheese and whipped cream. Stir through about half of the crushed meringue and a third of the fruit (chopped if the berries are large).

Spoon this on top of the biscuit base of each cupcake case and chill again.

Eton mess before sauce


Topping bit

Place half of the remaining fruit in a saucepan with a little sugar and a squirt of lemon juice, heat gently stirring & mashing with a fork until the fruit if soft and pulpy. Push the fruit mix through a sieve and use the puree to drizzle over your cheesecakes when serving.


Eton Cheesecake1

Eton Cheesecake


When you are serving the little cheesecakes add a dollop of cream some crushed meringue and some of the remaining fruit and a little drizzle of fruit sauce.


Eton mess plate

Below is a collage of all the participating bloggers treats with the links to go and check them out and say Hi!

BannerBerrylicious

1. Joan, Chocolate Chocolate and More– Lemon Blueberry Pound cake

2. Charity, Foodlets– Strawberry – Strawberry banana frozen yogurt pops

3. Jamie, Green Beans & Grapefruit– Mixed Berry & Cookie Butter Clafouti

4. Hani, Haniela’s– Red Currant Meringue Cake

5. Katrina, In Katrina’s Kitchen– Frozen Blueberry Basil Lemonade Pies

6. Sue, Munchkin Munchies– English Matrimonials

7. Bia, Rich and Sweet– Blueberry Blackberry Orange Streusel Scones

8. Sam, Sams Kitchen– Eton Mess Mini Cheesecakes

9. Sherron, Simply Gourmet Photography– Mulberry Syrup

10. Ann, Sumptuous Spoonfuls – Strawberry Chia Jam

11. Karen, Trilogy Edibles – Meringue Nest with a Bumbleberry Compote

Rice Crispie Cakes

ric crispiecakesThese are always a welcome sight at home and so easy to make. They are, in my opinion, much nicer then the chocolate ones.

But you can be the judge of that…….


This is pretty much the original 1970’s Kelloggs recipe I think, apart from the extract & not essence bit!


Rice Crispie Cakes

100g rice crispies

80g golden syrup

15g sugar

15g butter

a few drops of vanilla or almond extract

Put the syrup, sugar & butter in a large saucepan and melt then bring to the boil for one minute, stirring continually.

Remove from the heat and add the extract & rice crispies. Mix well. Divide into cake cases or in one large tin. Place in the fridge until set. I have pushed a cake pop/lolly stick into a mound of sticky rice crispie mix while in a cake case so that they can be picked up that way, seems to work quite well, until they fall off the stick!

They will keep in a tin for a few days if they don’t all disappear ♥

rice crispie cakes

Biscuit Necklaces (perfect for rainy days)

necklace bics2It was Frey’s birthday this week and she wanted a sleepover with a few of her closest friends.

I thought she may like a few things to keep them amused (and stop them texting for a few brief moments!) So I asked if she thought they would enjoy decorating some small biscuits to make a necklace.


I know it seems a little “young” for a bunch of 14 year olds but also know they like to do fun “kitsch” thing too. It got a big thumbs up and it proved to be a real hit.

necklace bics3


Remember those rock hard candy necklaces you used to get (and probably still can)? These are way better and actually properly edible!

cuttersI made a chocolate biscuit dough and then cut out smallish cookies from the fab set of cutters that Gav got me for Christmas (so useful for all sorts of things!) I then a small cut out for the centre.

On some I used the smallest cutter to do this, others I used a drinking straw.


necklace bics makingBaked as normal. Then stacked on plates ready to be decorated.

I laid out plates with cookies and then put loads of sprinkles & glitter in the centre of the table, also some ribbons for threading later.


They had a few bags of icing to act as “glue” and away they went.


necklace bics

Out of the 4 only 2 got made into a necklace of sorts as the other 2 managed to scoff them as they made them! But whatever the end result was, they had fun & giggles as the rain lashed down outside!

necklace bics4

Raspberry & Almond Mini Macaroons

raspberry & Almond mini macaroons6This recipe is being donated to the Save the Children & the Hidden Hunger campaign, Name the Day Challenge details here, via Ruth Clemens (The Pink Whisk).

An incredibly worthwhile cause, I am thrilled to do something to help.

I decided that I wanted to make something along the lines of the old teatime favourite macaroons. Remember those almondy treats on rice paper?

Well add some jam & flaked almonds and make the raspberry & Almond mini macaroons7size a little smaller and you get these!

They are a huge hit at my house now, so much so my daughter Frey has made them twice! I hope you like them too.

Raspberry & Almond Mini Macaroons

Ingredients

Rice paper

50g caster sugar

60g ground almonds

10g plain flour

1 egg white

½ tsp vanilla or almond extract

50g raspberry jam

small amount of flaked almonds slightly crushed to decorate with

Preheat the oven to 170 C (fan 150 C)

Line a baking sheet with rice paper. I used 2 sheets measuring 14 x 18 cm.

raspberry & Almond mini macaroonsMix together the sugar, ground almonds & flour.

In a small bowl lightly beat together the egg white, vanilla or almond extract & 25g of the jam.

Stir the wet into the dry and mix well.

Drop teaspoonfuls of the mix onto the rice paper. Press down slightly into the centre of each to make a dent and add a little of the remaining jam and then sprinkle with crushed almonds.

Bake for about 15 minutes until golden brown. When they cool, tear away the rice paper leaving just the bottoms covered. raspberry & Almond mini macaroons4


Makes about 15 small macaroons. Cute treat or as petit fours with coffee.


They keep for a few days in a tin if you have any left.

Enjoy ♥

Flavour variations

I’ve tried out a couple of different fillings, just a straight replacement for the jam, both work really well. Nutella and Lemon curd, with the lemon ones I used some chopped pistachio nuts on the top.

Nutella Macaroonslemon & pistachio macaroons


raspberry & Almond mini macaroons3

Millionaires Mousse Pud

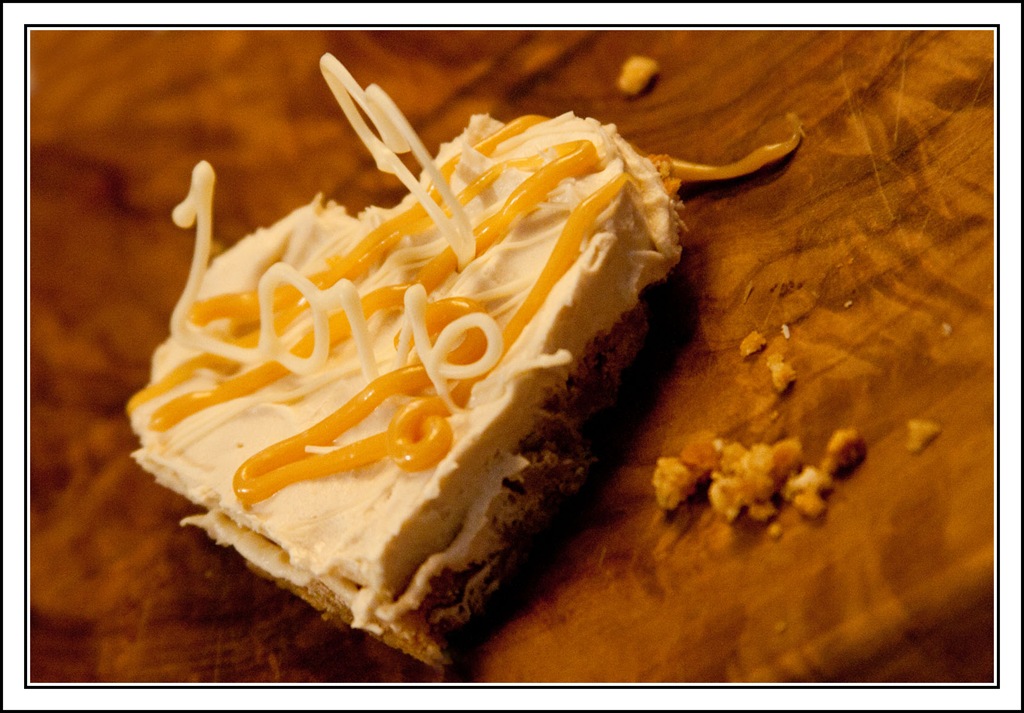
millionaires mousse 5I just lurve millionaires shortbread. If you’re follower on my Facebook page you’ll know that I have a little stack of them as my profile pic! (Facebook link on the right of the page)

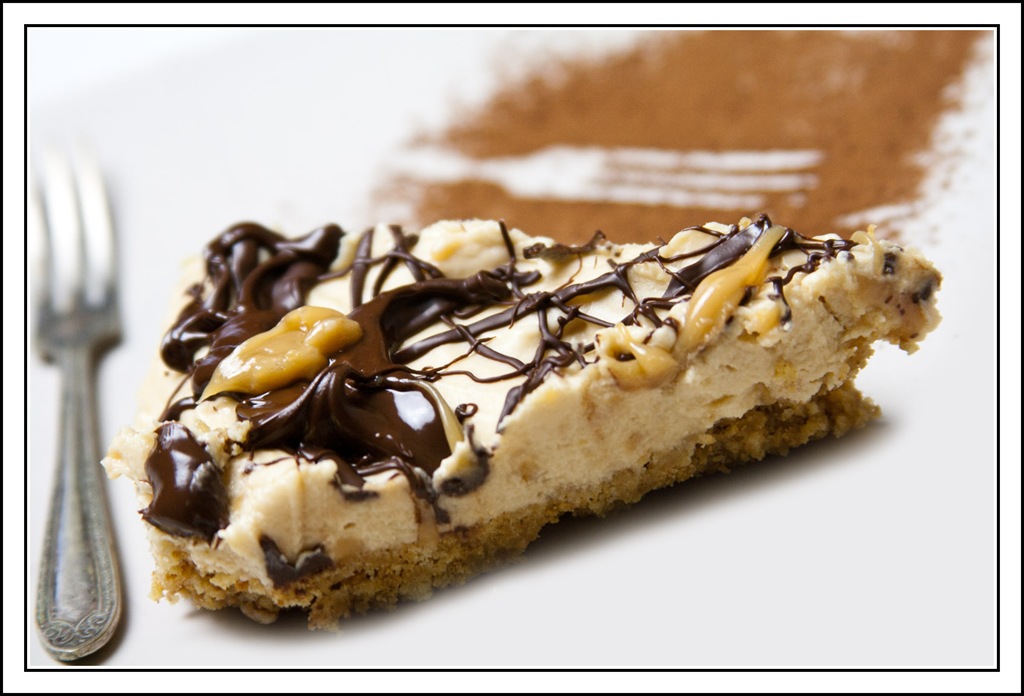
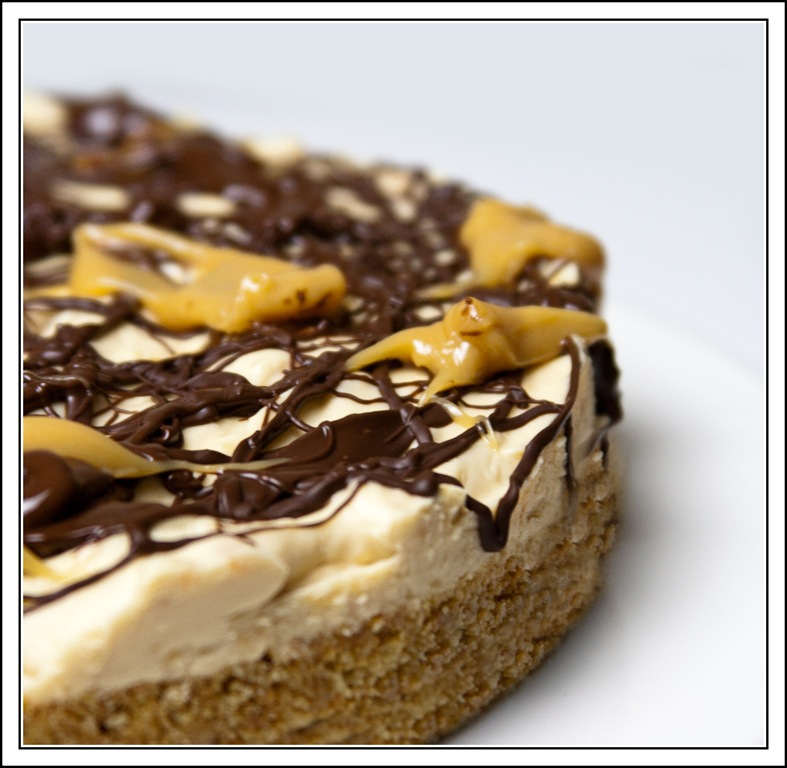
I decided to turn that concept into more of a dessert and this is the result. It’s a lovely buttery biscuit base, with a mousse textured caramel topping with chocolate drizzle. We all loved it and best of all, you can eat more then one slice as it’s not too sickly sweet!

Printable recipe here

Millionaire Mousse Puds

Base

125g crushed digestive biscuits

60g melted butter

Mousse bit

65g butter

25g soft brown sugar

1 tbsp golden syrup

½ a can of condensed milk about 200g

150 ml Whipped cream, whipped

Drizzle topping

50g melted chocolate

millionaires mousse4Mix the crushed biscuits and butter together and then press them into your greased/lined tin/container. Place in the fridge.

I used a 7” loose bottomed round tin but it’s also possible to use all manner of random containers. Think heart shapes & small circles.

In a saucepan gently melt all the mousse ingredients except the cream. Once the butter & sugar have melted and the mix is smooth, turn the heat up to bring to the boil. I used a balloon whisk to keep it moving while it bubbles gently away for about 4-5 minutes when it goes a little darker and becomes thicker. Beware it is red hot and splashes are very painful. Remove from the heat and allow to cool for 10 minutes, stirring a few times.

millionaires mousse2Now I’m sure you can use dulce de leche or caramel condensed milk for the same effect if you want to cut the time or washing up. I haven’t used that so can’t say how it compares.

Transfer the caramel into the bowl of your mixer. I kept back a spoonful so I could artfully (ahem) use this on top. Mix for a few minutes until the mix has started to cool, add the (already whipped) cream and mix briefly until combined. Give it all a good stir with a wooden spoon.

I’ve made this a few times and sometimes it’s smooth and sometimes it has little strands and bits of caramel, both are wonderful it depends how thick the caramel has gone. millionaires mousse3Spoon on to the biscuit base and place in the fridge to cool completely.

Remove from the tin and place on a serving plate. Drizzle with the melted chocolate (whatever you have or fancy) and warmed caramel if you kept a little back. Allow to cool back in the fridge and serve. Keeps for a few days covered in the fridge, if you have any left!


millionaires mousse 6

Heart Centre Cupcakes

heart cakeI saw this lovely idea a while back and thought they would be great for Valentines Day. I really should have had a look at how they were made, but thought ‘hey it can’t be that hard’!


It was just a little bit time consuming with a bit of planning needed but I was pleased with the results overall.


pink cakeI decided I would make the centre coloured cake and bake it almost all the way through. Allowed it to cool. I should have placed it on grease proof paper on the cooling rack, as it sunk into the tram lines on as it was slightly under done!


I then cut the heart shape with a cutter, I really could’ve done with red heartsone in between the sizes I had (always the way) but I also thought I’d hedge my bets and make a few different sized ones to experiment with. I had made 2 8” sponges of slightly different degrees of pinkness, so made a few to fit inside of each other, just to try stuff out. I had loads of rather pink cake left and made some cake pops & cake balls by adding buttercream and squishing them together, nice!


heart cakesI whipped up a vanilla cake mix and then put a blob in the cupcake cases I stood the hearts upright in the blob. I made sure they were all positioned the same way. Then filled in around them with cake mix. I thought I’d make some higher then others and see which worked best. I baked them as normal until firm.


I made sure when they were transferred to the cooling rack that they all were removed and placed the same way round to ensure the heart was in the right way for slicing through. This was fine with some as the heart was poking up still (good job I was planning on icing them then!) I made a sign indicating which way round they were (I know sad……)

heart cake pre cutI then used a buttercream icing making sure I put a dab either side where the knife should cut through the cake to expose the heart in all it’s glory!

I used a vanilla cupcake recipe, here’s the one I used
https://www.samskitchen.net/?p=132 
just leave out the Dulce de Leche (or not, up to you!)

For the pink/red cake I used 115g sr flour, caster sugar & butter, 2 eggs, 3/4 tsp vanilla extract & red food paste gel baked in 2 8” round pans.

Smaller heart used in this one, ooops a tad wonky!

small heart

Baileys Truffles

trufflesI was recently given a truffle recipe by the lovely lady running a marzipan shaping day I attended. She had made a batch for us to eat and gave out the recipe. The thing that I liked (apart from the taste of course) was that they do not contain fresh cream, when they have cream in them they have to be kept in the fridge. This is fine most of the time but can be a problem when giving them as a gift.

Easy peasy to make and you can make them with the kids, just swap the alcohol for something else (maybe a few drops of vanilla essence). I used Baileys in mine but of course you can use whatever you have or fancy.

baileysTruffles

100g dark chocolate

100g butter

100g ground almonds

100g caster sugar

4 tsp Baileys (or your choice)

Decorations or dustings of your choice ie: vermicelli, cocoa, icing sugar, coconut.

Makes 30 large truffles.

In a saucepan gently melt the chocolate & butter together. Remove from the heat and stir in the rest of the ingredients until well mixed.

Place in a bowl allow to cool then cover and put into the fridge until firm.

When you’re ready to make the truffles take teaspoons of the mix and quickly roll into a ball and cover in your choice of topping then place in a petit four case or loose on a plate. I like to pop these back in the fridge to firm up again after shaping. Then they’re ready to give as a gift or eat! Because they have no cream in them they do not need to be kept in the fridge all the time, store in a cool place. Keep for up to a week.
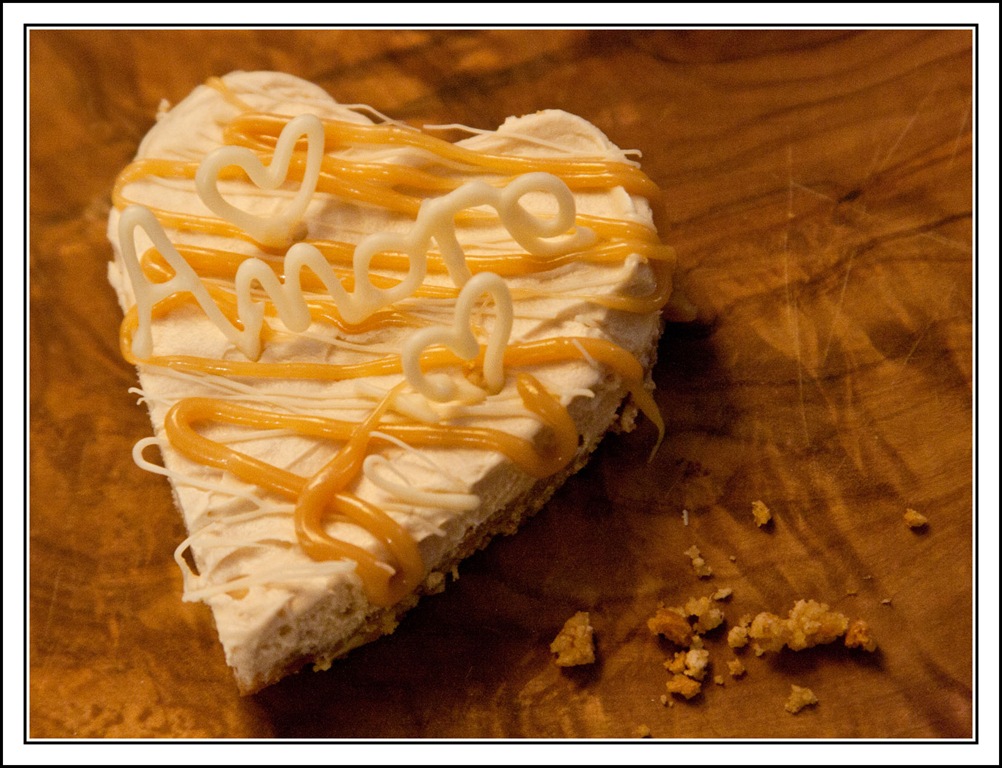
Baileys truffles1Blinged up real nice with gold lustre & red glitter!

bailey truffles