Tag Archives: Food Photography

Ricciarelli Hearts

I made my version of these 4 or 5 years ago doing research for a magazine article. They are delicious and very moreish. Originally a macaroon style biscuit form Siena in Italy and often given as Christmas gifts. As I have a love of most things Italian they are a staple on my baking list!


ricciarelli-rice-paperI decided to change the tradition shape from a lozenge to heart shaped and to use some lovely coloured rice paper (wafer paper) sheets I bought from Squires Kitchen earlier in the year.

Download the recipe here: ricciarelli-hearts

Ingredients 

200g ground almonds
200g icing sugar
1/2 tsp baking powder
2 egg whites
1 tsp vanilla extract
Grated zest of 1 lemon
1 tbsp runny honey
2-3 large rice paper sheets (approx 28 x 18 cm each) coloured if you can get them
A little icing sugar to dust with

ricciarelli-shapedMakes 20

Oven preheat 180°C (160°C Fan) GM4

Sieve the icing sugar in to a large mixing bowl, add the ground almonds and baking powder and stir.

Add in the vanilla, lemon zest and honey and briefly stir through, it will be crumbly and uneven in texture at this stage. It will all come together later when you add the egg whites.

hearts


In a very clean bowl whisk the egg whites until they form stiff peaks. Add the whisked egg whites to the bowl with the other ingredients and mix well until you have a lump of sticky dough. Wrap the dough in clingfilm and place in the fridge for at least 6 hours, preferably overnight.

When you are nearly ready to bake them, preheat the oven. Prepare the rice paper by cutting out some heart shapes. Use the template to help you or make your own measuring about 6cm at the widest across, and about 6 cm from the dip at the top to the point at the bottom. You’ll need 20 of these.

Download the A4 sized template from www.samskitchen.net/wp-content/uploads/2016/12/hearts.jpg

Divide the dough mixture in to 20 fairly equal sizes (I weigh mine to get it equal), then using your hands shape them into a rough heart shape to fit on the rice paper , so they are just inside by a few millimetres all round (they expand over this when baked). Repeat with them all. Place them on the baking trays making sure you leave a gap around each. Dust with icing sugar.

Bake for about 10 minutes until golden. Leave to firm up for a few minutes on the baking tray then transfer to a cooling rack. They keep well in a tin and actually taste even better the day after baking. Enjoy ♥

   ricciarelli-above ricciarelli-baked ricciarelli-3


Melting Chocolate Moments

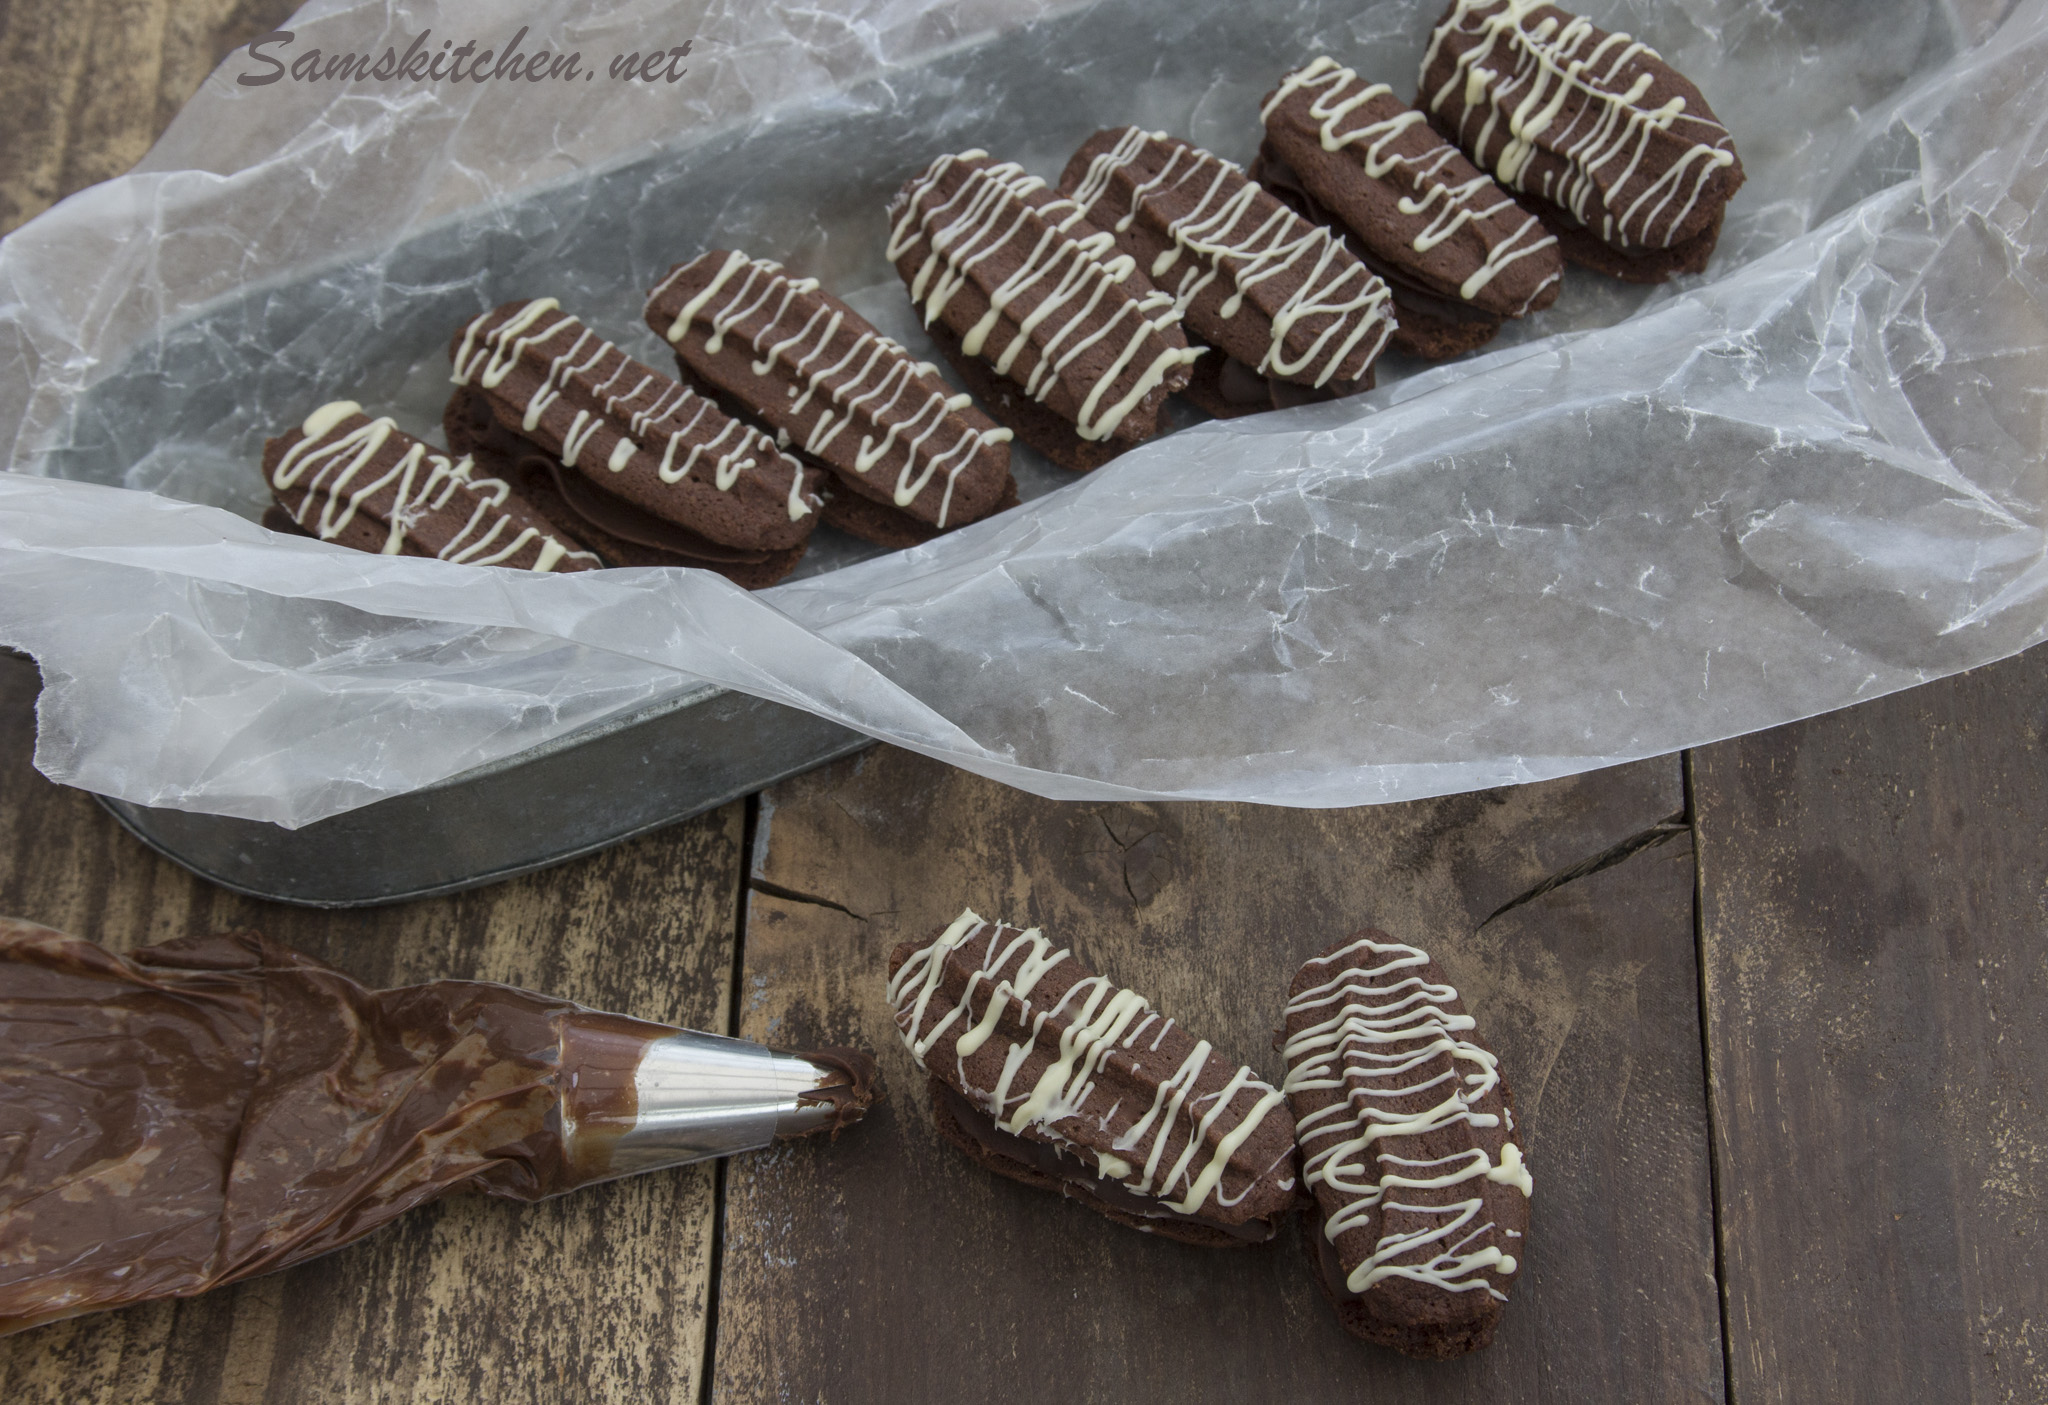
These are like Viennese fingers or whirls but all chocolate! Very crumbly melt in the mouth biscuits sandwiched together with dark chocolate ganache. I use fairly reasonably priced chocolate from the supermarket for most of my baking, saving the good stuff for eating straight 🙂


Melting Chocolate Moments

Cookies

175g soft butter

55g icing sugar

1 tsp vanilla bean paste

150g self raising flour

25g cocoa powder

Ganache filling

200g dark chocolate, chopped

150ml double cream

15g butter

25g melted white chocolate to drizzle (optional)

Makes about 15 large or 30+ small complete cookiesmelting-choc-2

  1. Make the ganache first so it has time to cool and firm up a bit. Heat the cream in a small saucepan to boiling point. Remove from the heat and add the chopped chocolate and butter. Stir through until all melted together. If there’s still a few lumps place over a low heat and stir until all gone. Set aside to cool. Place in the fridge in a container until ready to use as filling.
  2. melting-choc-1Preheat the oven 180°C 160°C (fan) GM4. Beat the butter until soft and creamy. Add the sieved icing sugar and vanilla bean paste, beat together until combined and smooth. Add in sieved cocoa and flour and bring together, either by beating briefly with your mixer or by wooden spoon or spatula. Make sure it’s an even colour and there’s no lighter streaks.
  3. Prepare a piping bag, for the larger ones I used an Ateco 866 pastry nozzle and the smaller ones a Wilton 1M. You’ll get a different look if you use other nozzles so try a few. Place some of the cookie mix in the piping bag. Pipe lengths of about 5-6 cm onto a lined/greased baking tray. The piping is hard work as the mixture is quite stiff, ensure your piping bag is strong and the butter is really soft at the start, this will help. Make sure you give them room to expand in the oven. Bake until just starting to colour at the ends about 10-12 minutes for the larger ones a few minutes less for the smaller ones. They will be firm to the touch, be careful not to over bake them, they burn quickly and it’s not easy to tell as they’re already brown!
  4. melting-choc-aboveLeave to cool completely on the trays. The cookies are very fragile, especially so while still warm. Once cooled use a small spatula or knife to move them. Pair them up so they’re roughly in pairs of the same size and shape. Turn over one half of the pair, if you’re using the white chocolate drizzle across the tops now, or wait until you’ve assembled them, either works. I used a piping bag with a small snip at the end or use a spoon.

5. Fill another piping bag with the cooled ganache filling, it needs to be a soft spreadable and pipeable consistency. If it’s too sloppy place in the fridge for a little while, if it’s too stiff heat very briefly in the microwave and stir, repeat until you are happy. Place some in the piping bag and fill the upturned cookie with a line of luscious filling, pop the top on and leave until the white chocolate is set. Enjoy ♥

melting-chocolate-momentsmelting-choc-4

Food Photography Lighting Ideas


Although I love using natural light for a lot of my food photography, sometimes it’s just not an option. The UK has many days when the sun does not appear and when it does it’s not for long enough! So I have a few lights at hand to make sure I’m not limited.

aimg_1788

The Pixapro Glowpad 350 works really well for me and also means I can control where the light is used and how much light. It’s amazing how much difference moving the light makes to the end result.

aimg_1776

Check out my video to how see how I created the images.


Pouring Spoons Food Photography Video

I had great fun creating these images and putting it in to a video for Essential Photo using some of their brilliant Pixapro Glowpad lights. Excellent slim LED light panels that are battery operated which makes them super portable.


All the messy stuff was done before videoing, testing consistency and balancing spoons were definitely the hardest and stickiest bits! Worth practising and making sure you use items that wipe clean easily. We fashioned a box (from discarded packaging) using bluetack to secure the spoons as they need to be able to withhold whatever you’re pouring on to them.

[embedyt]http://www.youtube.com/watch?v=aOi-b7POtMk&sns=em[/embedyt]

You could use this idea to create your own food ‘art’ images using honey, sauce, syrups etc. Just have a test run with pouring first to make sure you have a good flow and catch what you pour underneath so you can keep recycling. Enjoy ♥


Sams Kitchen Bourbon Biscuits

Bourbons Biscuits

bourbons1jpgI love biscuits, they are the perfect accompaniment with a cuppa, great for a mid afternoon pep and handy for snacks & picnics.

Here’s my take on that fab chocolatey classic, the bourbon. I hope you love it as much as we do.

Download the recipe here

Ingredients

Biscuit bit

125g soft butter

55g soft brown sugar

155g plain flour

25g cocoa

Filling bit

40g soft butter

80g icing sugar

15g cocoa

A little milk

choc biscuit doughFor the biscuits

Cream the butter & sugar until light & fluffy, sieve in the flour & cocoa and mix well until you form a ball of dough. Place the dough in a bag in the fridge for at least 30 minutes.

When you’re ready to shape the biscuits preheat your oven 190°C (fan 170°C) GM 5

Roll out the dough gently on a lightly floured work surface to about 4 mm in thickness. Press out the shapes you would like and place on a greased/lined baking tray. If you’d like to add the little holes to the top then prick these (with a skewer or fork) on half the biscuits before they are baked. I sometimes use my small letter set to add text too.

bourbons2Bake for about 10 minutes so they are evenly baked top & bottom, they will be firm to the touch and a little darker at the edges. Keep a close eye on them as they can burn easily. Remove from the oven, allow to cool for a minute or 2 then transfer to a cooling rack.


For the icing

Place all the ingredients in the bowl of your mixer apart from the milk(or beat by hand) and combine, then beat until light and fluffy, add a little milk to create a spreadable consistency.

Spread on one of the biscuit bottoms and sandwich together with a top.  Will last several days in a tin if they don’t all get eaten straight away! Enjoy ♥

Bourbons & Tea


bourbons2    

T