Category Archives: Recipes

Brainies!

Brains skull closeHave been meaning to make these for about a week, ready for Halloween and by the skin of my teeth I managed to get them ready before the doorbell rings with trick and treaters!

You could add these brains to cupcakes, biscuits or traybakes. I thought brownies worked well and then you can call them Brainies!

Brains shaping

I used Fudge and Chomp bars as the dome for the icing to go on. Shaped slightly so they are more like a lozenge shape. using the fat end of a piping nozzle works well to shape the ends. Mine were about 2.5 cm long, you can make them whatever size suits your project.


Using a vanilla buttercream coloured pink attach the chocolate to the brownie.Brains attached I used a round piping nozzle with a diameter of about 3-4 mm, change the size to suit you. Then pipe a slightly wiggly line down the centre.

Brains stem

Next pipe in a continuous line up and down the side, then the other side like a long wiggly worm!

brain above

To add some blood I used jam with a little water added to make it a runnier consistency. Sieve it to get a gel, then for an added zing I put in some red colour gel.

Brains jam

Brains skull closeDrizzle with a small spoon or pipe over the brains randomly. Enjoy!


Brains skull plate

Oaty Coconut Crunch Cookies

Oat coconut crunchies close stackI had a bit of a craving recently for a crunchy cookie with oats and coconut, I seem to remember years and years ago making something scrummy with oil and not butter so felt the need to create them again!


I had some wheatgerm in the cupboard so decided to add some, it is a great source of vitamin E and Folic Acid too. I got mine from Waitrose in the UK and I’m sure you can buy it at health food shops.

They are delicious, sweet with a lovely oat bite and a fab crunch (fairly delicate, although I did manage to transport them without many breakages)

These are perfect with a cuppa of course and will keep in an airtight container for several days if they don’t get munched straightaway.

Recipe can be printed

Oaty Coconut Crunch Cookies

125g porridge oats

25g wheatgerm

25g dessicated coconut

150g soft light brown sugar

120 ml sunflower or vegetable oil

1 egg lightly beaten

1/2 tsp vanilla bean paste or extract

Makes about 30

In a large bowl place the oats, wheatgerm, coconut and sugar. Stir in the oil. Leave for about an hour.

Preheat the oven 160°C (fan 140°C)

To the oat mixture add the egg and vanilla, stir until well combined.

Oat coconut crunchies trayOat coconut crunchies flatten

Place heaped teaspoonfuls of mixture on a lined baking tray (I love using the magic reusable liners), they need room to spread so 6 on a standard sized baking tray is plenty. Press them flat with a fork that’s been dipped in water (this stops it sticking too much to the mixture). Shape them in to rounds if you wish.

Oat coconut crunchies large


This is what happens when they are baked too close together, they get a little friendly in the oven! Of course I only did that to show you *ahem*.


Oat coconut crunchies plateOat coconut crunchies stack

Bake for 14-18 minutes until evenly golden. Allow to cool slightly on the tray until they harden up enough to transfer to a cooling rack. Enjoy ♥

Oat coconut crunchies above

Nectarine & Amaretto Sorbet

Amaretto bottleSome things just remind you of summer and care free times, or may be it’s just the alcohol in this that does it!

This bottle of Amaretto was brought on our first wedding anniversary in Sorrento, total bliss and after several (!) years we still haven’t drunk it all, quite amazing really!

We just happened to have some nectarines ripe and I thought they would go perfectly together, and they did………

Nectarine & Amaretto Sorbet

6 just ripe nectarines

150g caster sugar

750 ml water

4 tbsp. Amaretto

Bring the sugar & water slowly to a gentle boil. Allow to boil for 5-10 minutes stirring occasionally, until the water starts to turn slightly syrupy. Remove from the heat.

Chop the nectarines into chunks (either with or without the skin, the skin gives a pretty fleck to the sorbet, without means a more smooth finish). Add the flesh and the Amaretto to the slightly cooled sugar water and blitz in a processor until smooth.

Place in the fridge until completely cold. Use an ice cream maker to churn until the freezing process is under way (the sorbet will be starting to freeze but will still be slushy) then quickly transfer into a sandwich container and freeze.

If you don’t have an ice cream maker just make sure you give it a good stir round once it’s been in the freezer for 2 hours and again after another 2.

Works well as a light pudding or between meal courses. I like it best whilst sitting in sunshine in the garden! Enjoy ♥

Nectarine Amaretto sorbet

Lemon & Elderflower Sandwich Biscuits

Lemon & Elderflower trioThese little cuties used some of the Elderflower Cordial I made recently. They really do taste like summer to me. Of course you can use brought cordial, which means you can taste and dream of summer all year (which I do…..)

Perfect in the garden with a cuppa!

Printable recipe:


Lemon & Elderflower Sandwich Biscuits

125g soft spread/butter

60g golden caster sugarElderflower cut lemon

180g plain flour

Grated zest of 1 lemon

Filling

50g soft butter

200g icing sugar, sieved

2 tbsp Elderflower Cordial

Preheat oven 190°C (fan 170°C)

Makes 12-16 complete biscuits depending on your cutter size

Cream the butter and sugar together until light & fluffy. Sieve in the flour and add the zest, mix well, bring together to form a ball of dough. Cover and place in the fridge for at least 30 minutes to chill.Lemon & Elderflower dough

Roll out on a well floured surface to about ½ cm thick. I pressed an impression mat gently on top of my dough so after baking their was a slight hint of texture (it was a flower pattern) this is of course optional. Use cutters, I used flowers that are about 4 cm at the widest. Place the cut out biscuits on a baking tray and bake for 10-15 minutes until starting to turn golden, the bottoms should be golden too so you know they’re baked through.

Lemon & Elderflower cooling

Leave on the baking tray for 5 minutes then transfer to a cooling rack.

To make the filling, beat the butter until very soft and fluffy. Add half the icing sugar and beat, then add the rest and the cordial and beat until creamy and smooth.

Lemon & Elderflower aboveLemon & Elderflower filled

Fill a piping bag (with a nozzle of your choice) with buttercream, pipe a generous amount on the underside of one biscuit, top with another biscuit squeezing them gently together. Enjoy! ♥

Lemon & Elderflower biscuits

Elderflower Cordial, Summer Picnic Party!

Elderflower cordial bottles glassElderflower, the smell & taste always reminds me of summer. Perfect for alfresco dining & picnics! So I thought that it would be ideal to join in the blog Summer Picnic Party that Hani & Beth have organised.

All the other picnic peeps lovely posts are further down the page and are so inspiring and summery. There’s also a competition to enter with some lovely prizes, so scroll down for more details.


Elderflower Cordial is also a brilliant ingredient to add that beautiful flavour to other things, cocktails, cookies, cakes etc

I’m lucky enough to have an elderberry tree in my garden so make things from the flowers & berries most years. They flower between May-July in the UK.

This is my recipe, I’ve tweaked it over the years & this years is the best ever! Sometimes the flower flavour can be overpowering but with the citrus notes this is balanced in total harmony for me.

Elderflower picked

Check out all the other fantastic recipes from my blogging pals, links below ♥

recipe here


Elderflower aboveElderflower Cordial

Ingredients

875g sugar (caster or granulated is fine)

25 elderflower heads

Zest of 3 lemons

Zest of 1 lime

Juice of 1 lemon

Juice of 1 lime

45g citric acid (available from chemists or online)

1.3 litres of boiling water

Place the sugar in a large saucepan or heat resistant bowl. Pour the boiling water over and stir gently until all the sugar has melted.

Elderflower cut lemon

Add the zest & juice. Slice the remaining 2 lemons and add this too. Stir and add the citric acid. Lastly place in the elderflower heads* and gently stir through. Cover the bowl/pan with a clean tea towel and leave somewhere cool (not in the fridge) for 48 hours, try and remember to give it a stir after 24 hours.

Elderflower citrus in bowlElderflower in bowl

Next, strain through a sieve, I line mine with muslin to make sure the little bits don’t get in the cordial. Then pour into some sterilized bottles**. Seal and keep somewhere cool, it can keep for several months but I prefer to use mine within a month. Once opened store in the fridge and use within a week. Use as you would a cordial, dilute with water to taste. Or lemonade or tonic or add a drop of vodka for a kick!

Elderflower pouringElderflower juicing

Lemon & Elderflower biscuits* Give them a shake and remove any dead bits, insects etc. I don’t wash mine but they are from a tree in my garden so know where they’ve been!

** I sterilize my bottles and jars in the dishwasher or in the oven for 15 minutes on a medium heat.

These are Lemon & Elderflower Sandwich Biscuits, recipe here https://www.samskitchen.net/?p=1269………..♥


Giveaway…

GiveawayPicnicBlogParty

GIVEAWAY SPONSORS

Thank you to all the amazing Giveaway Sponsors. Be sure to check out their websites below.

The Marshmallow Studio

Restaurant Ware

The Cookie Cutter Company

Wilton

Mary Had a Little Party

King Arthur Flour
To enter giveaway please use the Rafflecopter link below. Giveaway will run from July 20th, 2013 till July 27th, 2013. 6 Winners will be picked using the Rafflecopter widget. Prizes will be picked in the order of sponsors you see above, starting with The Marshmallow Studio and ending with King Arthur Flour. Winners will receive one email from hanielas@yahoo.com. Winners will  have 48 hours to respond. New winner(s) will be picked if we don’t hear from you. Thank you and good luck.
Rafflecopter giveaway

Neapolitan Coconut Ice

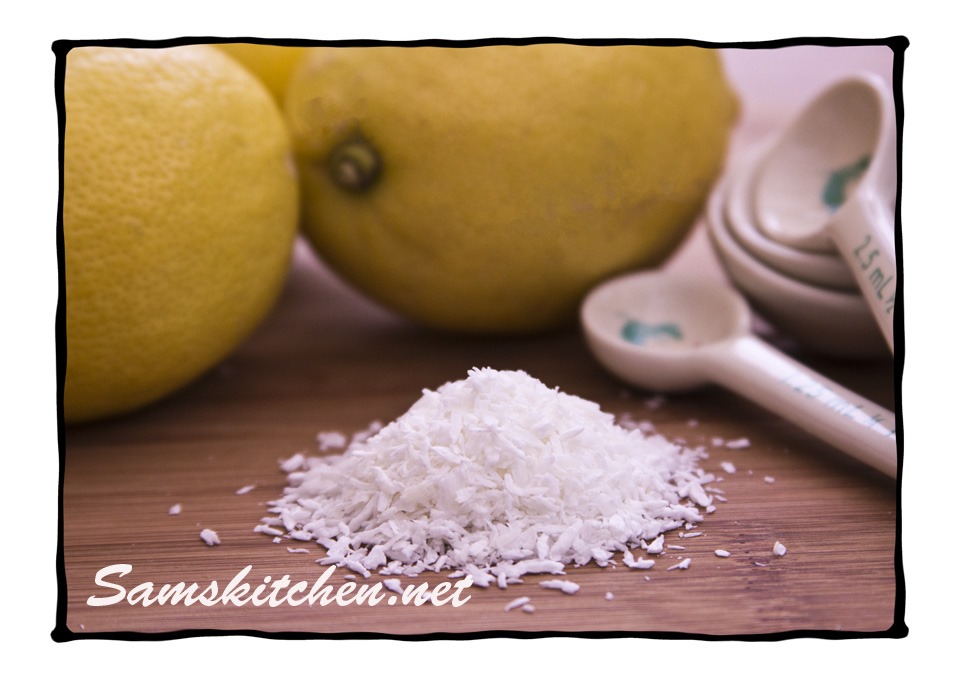
coconut iceI love coconut but don’t often use it.

It’s been years since I made coconut ice and I thought I’d try and make an easy, quick and delicious recipe which means I won’t leave it years until I make another batch!


What spurred me on to make this now was this months Foodie Penpal (details can be found here http://thisisrocksalt.com/foodie-penpals/?contact-form-id=4017&contact-form-sent=7020&_wpnonce=ee5ab37b4c) a lovely lady named Kelly, said that she really loves coconut, so I made some to include in her parcel.

The 3 colour look is just something I wanted to try and thought would look pretty. You could leave it plain or go colour nuts or theme the colours for party favours! You could even add a little flavoured essence (like strawberry or raspberry) to the pink layer).


Printable recipe here


Ingredients

200g desiccated coconut

200g icing sugar, sieved

150g condensed milk

50g coconut cream

30g melted plain chocolate

Pink food colour gel

I used a parchment lined small lunch container. The size of the box was 12 cm square so anything about that size or a little larger is good.

Place the desiccated coconut and icing sugar in a large mixing bowl and stir.

Add the condensed milk and coconut cream (tinned coconut cream is found in most supermarkets or some specialists shops in the UK not sure how widely available it is worldwide but if you can’t get hold of it just replace with equal weight of condensed milk) stir well together to combine.

Weigh the whole lot then split into 3, place each in a bowl. Add a little pink food gel to one bowl, the one I use is Wilton Rose (add a lot if you want a very pink colour!) mix well so it is a nice even colour.

To one other bowl add the melted plain chocolate and stir well. Leave the other plain white.

Coconut ice uncut

Place one of the bowl’s contents of coconut ice into the lined container (the colour choice is up to you) and press down until it’s even and compacted. I found placing a piece of parchment on top and pressing down with a small flat bottomed glass helped. Repeat with another colour and then again with the last colour.

Loosely cover and allow to set on the side for a couple of hours. Once it’s firmed up you can remove it from the container and slice as you wish. Keep in a tin for a week or so. ♥

coconut ice plate

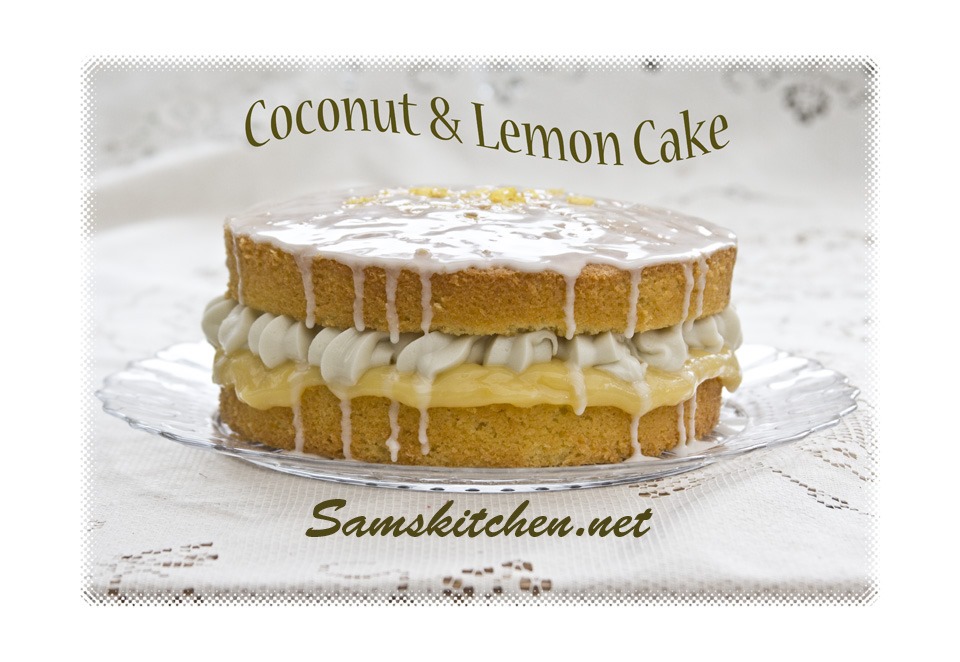
Coconut & Lemon Cake

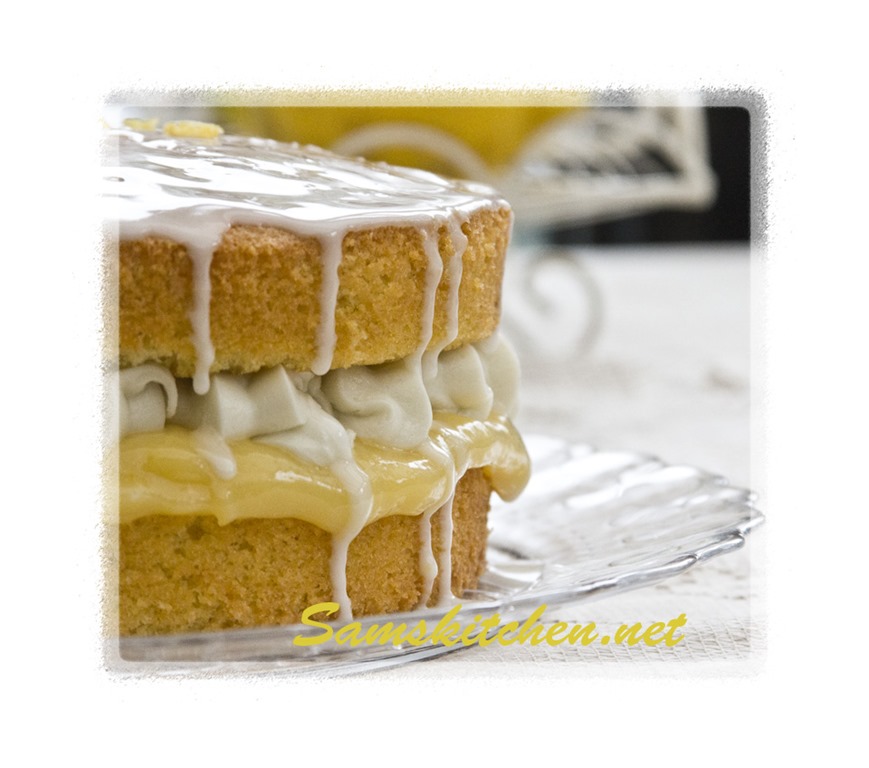
Coconut and Lemon Cake1Found myself with a lemon that needed using, well that’s all  the excuse I needed to make this!

I love lemon & I love coconut, so this was a sweet delight. I actually found it tasted better the day after it was made, of course I am only eating the cake every day to make sure it’s rigorously tested for you (I know I’m all heart!)

The coconut cream used in the recipe is readily available in supermarkets in the UK now, it comes in a little tin, it’s thicker then coconut milk. I’m sure, maybe with a little hunting you’ll find it where you are too.

Coconut and Lemon Cake2

Coconut & Lemon Cake

Ingredients

175g soft butter or spread

225g caster sugar

50g coconut cream

175g self raising flour, sieved

50g ground almonds

Grated zest of 1 lemon

50g desiccated coconut

4 eggs, lightly beaten

1 1/2 tsp baking powder

1 tbsp lemon juice

Filling

100g soft butter

4 tbsp coconut cream

350g icing sugar

4 heaped tbsp lemon curd

You could use whipped double cream & lemon curd for a less sweet option instead.

Icing drizzle

100g icing sugar sieved

Approx 2 tbsp lemon juice

Preheat oven to 180°C (fan 160°) GM4

Grease & line the base of two 8″ sandwich tins.

coconut & lemon

The cake bit

In the bowl to your mixer add the butter/spread & sugar and beat until light & fluffy. Add the rest of the cake ingredients and beat until well combined (it won’t be completely smooth because of the almonds & coconut)

Divide equally between the prepared tins and bake for about 25 minutes until firm to the touch and a skewer comes out clean. Leave to cool in the tin for 5-10 minutes and then transfer to a cooling rack (tipping out one or both on a tea towel in your hand first then flipping over to make sure the top stays nice) Allow to cool completely.

Filling bit

To make the buttercream, beat the very soft butter in a mixer for a few minutes then add the coconut cream and beat again until fairly combined. Add about half of the icing sugar and beat again until combined, then add the rest and beat until smooth.

If you’re piping the buttercream on then spread the curd on the bottom layer of cake first, if you’re spreading with a knife then do that first and then drizzle over the curd.

Drizzle on the top bit

Mix the icing sugar with enough lemon juice to make an icing the consistency of double cream and spread over the top, dripping down the sides is totally allowed! Enjoy ♥

Coconut & Lemon cake

Cappuccino Biscuits

Cappuccino biscuits cocoaI love coffee but rarely make coffee flavoured things as I am surrounded by tea drinkers (I love tea too!) I suppose that is the perfect excuse to make something and scoff the lot really!

Anyway, in need of a coffee fix I made these which to my surprise were rather liked by Gav (darn must add more coffee next time!).

They are not overpowering in flavour but strong enough to know it’s coffee with a creamy centre, perfect with a cup of coffee of course!

Cappuccino Biscuits

For the biscuit bitCappuccino biscuit tray

125g soft spread or butter

55g Soft brown sugar

155g plain flour sieved

1 tsp Instant coffee ground finely (I used my pestle & mortar)

For the filling bit

40g soft butter

80g icing sugar, sieved

1/4 tsp finely ground instant coffeeCappuccino biscuit fillingl

1/2 tbsp milk

1/4 tsp vanilla bean paste or vanilla extract

Makes 18 complete sandwich biscuits (1.5″/3.5cm diameter cookie cutter)

Biscuits

Cream the butter & sugar together until light & fluffy.

Add the flour & coffee and mix through until combined and smooth. Place the ball of dough in clingfilm in the fridge for at least 30 minutes.

Preheat the oven to 190°C fan 170°C gm5

Line/grease 2 baking sheets.

Roll out the dough on a floured surface (add flour as needed because the dough can be quite sticky). Once evenly at a thickness of about 0.5cm then cut out the cookies, I used 1.5″/3.5cm diameter cookie cutter. Continue to re roll all the dough and cutting cookies until all used.

Place on the baking tray with a little space around them and bake for about 12 minutes until they start to turn a light golden colour. Remove from the oven and cool on a rack.

Cappuccino biscuit cool

Filling

Beat the butter until soft & creamy. Add the other ingredients and slowly beat together. Once combined increase the speed until the frosting is smooth & creamy.

Cappuccino biscuits 

Once the biscuits are cool spread or pipe the filling into the centre and top with another biscuit. Sprinkling of cocoa optional! ♥

Cappuccino Biscuits love

Honey Bunny Cakes

bunny closeI love experimenting in the kitchen especially when the results are delicious. So here’s the result of this weeks playing about. The cakes are delicious with a denser texture then a cupcake with the scrummy addition of ground almonds and honey.

The decoration is of course optional and easy peasy & fun to do with the children.

Measurements conversion chart here http://www.deliaonline.com/home/conversion-tables.html

Recipe printable

here

Honey Bunny Cakes

The cake bit

115g soft spread/butter

85g soft brown sugar

2 eggs, lightly beaten

85g sieved self raising flour

30g ground almonds

1/2 tsp baking powder

2 tbsp runny honey

1/2 tsp mixed spice

bunny cakes

Icing bit

150g soft butter

150g cream cheese

1 tbsp runny honey

1 tsp vanilla extract

300g icing sugar, sieved

Bunny earsFor the bunny bit

Florist paste

Pink food paste

Preheat oven to 170°C Fan 150°C GM3

Makes 10-12

Line a muffin tin with cupcake cases

For the cupcakes, cream together the butter/spread & brown sugar, beat until smooth & fluffy.

Add the rest of the cake ingredients and beat briefly until smooth & combined.

Spoon into the cases until about half full.

Bake for 15-20 minutes until firm to the touch and starting to turn a golden colour on top.

Allow to cool completely.

To make the icing, beat the butter until creamy and smooth. Add the rest of the ingredients and mix gently until combined. Beat until smooth & fluffy.

bunny cakes 2


The icing can be kept in the fridge until you are ready to pipe or spread onto the cakes.


To make the bunny bits, I used 2 of the rose cutters from a set from Pretty Witty Cakes http://www.prettywittycakeshop.co.uk/products-page/cupcake-sized-cutters/rose-petaltear-petal-cutter/ The largest & the smallest.

Bunny ear

Then a dab of water to stick the 2 together. The little nose is a small heart plunger cutter.

Naughty bunnies!

Bunny plops

Place on just before serving. Bunny tails are optional! ♥

Bunny cakes3

Doughnuts & Vanilla Cream

doughnuts fill


The lovely Hani http://www.hanielas.com/ recently asked if I would join her making doughnuts, errrm well let me see…..of course! Love her, love doughnuts it’s a no brainer!


So here are my sweet offerings. My two love jam but I thought I’d try something a bit different inside, actually this is total heaven and I’d have been happy just scoffing that!


The doughnut bit

240g strong white flour

25g granulated sugar

1/2 tsp salt

1 tsp fast acting dried yeast

25g soft butter cut into small bits

45ml warm water

70ml milk

1 size small beaten egg (or about half a large one)

You’ll also need:

Oil for frying in either a deep fat fryer or a saucepan

Some caster/icing sugar to coat them after frying

The vanilla cream bit

45g caster sugar

25g cornflour

100ml milk

1 egg yolk

25g soft butter cut in to small bits

1 tsp vanilla bean extract

85ml double cream

Makes 8

Doughnut open

Making the vanilla cream bit

Place in a small saucepan the cornflour, caster sugar & milk, whish together over a low/medium heat until smooth. Add the egg yolk and butter and continue to whisk. Increase the heat slightly and continue whisking so that the mixture stays smooth as it thickens. It will thicken right up to a stiff paste. Remove from the heat and tip into a bowl. Cover over with clingfilm so that a skin doesn’t form and allow to cool completely.

Once cool place in a large bowl or the bowl to your mixer. Add the cream and vanilla bean paste and beat for several minutes on high (you can beat by hand but it’s rather exhausting!) you are looking for a light smooth consistency stop when it reaches this. Place in a container until you are ready for the filling. Can be kept in the fridge for a few days.

Making the doughnut bit

In a large bowl or the bowl to your mixer place all the doughnut ingredients. Mix together either by hand or with the dough attachment. Then either knead by hand for 5-10 minutes until all elastic and smooth or use the mixer for about 5 minutes to achieve the same. Cover the bowl with clingfilm and leave in a warm place to rise until about doubled in size (1-2 hours). Take the dough out from the bowl and knock it back (knock the air out) then shape into 8 equal sized balls and place on a lined/greased baking tray. Cover with oiled clingfilm and place in a warm place again for about an hour until double in size.

Proving

Heat the oil until it reaches about 180°C (I used a sugar thermometer) and then fry in batches until a very deep golden colour, making sure you turn them over so they cook evenly. Remove from the oil and dunk in a bowl of caster or icing sugar.


First doughnut


First doughnut ready!


I filled mine using the jam/filling nozzle in a piping bag loaded with the vanilla cream, I waited until they had cooled slightly but they were still a little warm. Enjoy straight away!

Doughnut nozzle

Enjoy! ♥ Hani’s totally delicious Vanilla Doughnuts with Raspberry Jam are here oh my you’re gonna love these! http://www.hanielas.com/2013/03/carnival-vanilla-doughnuts-with.html#.UTCWnldE7kU

collagefDoughnuts